
 After the announcement of the birth of my cousin's daughter Z, I decided this was a perfect opportunity to try making something. Y'know, something proper. After all, my poor neglected sewing machine has only done mundane jobs such as turning up jeans and darning socks as yet! To be fair, though, I only got it at Christmas, and even if I had thought about making Isaac something before he was born, the massive belly would've rather scuppered plans, I feel.
This isn't a tutorial - most definitely not! - but does show how I put this dress together and might help anyone wanting to try out the pattern. Speaking of which, the pattern is a freebie from the fab Made By Rae - do check out her blog! I happened upon her pattern when searching for 'baby dress pattern' or something along those lines. It's a great pattern in that it's easy for newbies, because it has no fastenings, buttons, or anything else like that which I would totally screw up.
All the fun stuff after the break.
I did some wardrobe scrounging for this dress, and pulled out a red holiday club shirt which I was never ever going to wear again (it was one of the ones I packed in my hospital bag to wear in labour, which shows you how much I cared about it! Of course it never got used because of the caesarean), and the other one was a rather nice but a bit frumpy white long sleeved top that I did like but never wore due to the fact that I hate long sleeves.
Drawing out the pattern and cutting up the material was actually one of the hardest parts, because it was so stretchy. It took me several goes to get that bit done alone!

So. First instruction after that: "With right sides together, sew the two skirt pieces together along the
9” sides with a 1/2” seam." Easy peasy. Haha - here I made my first mistake. I only sewed one seam. No idea why! Thankfully this was no problem at all and easily fixed later!
Second instruction: "Using a long stitch, sew around top edge of skirt 1/4” away from the
edge. Gather skirt."
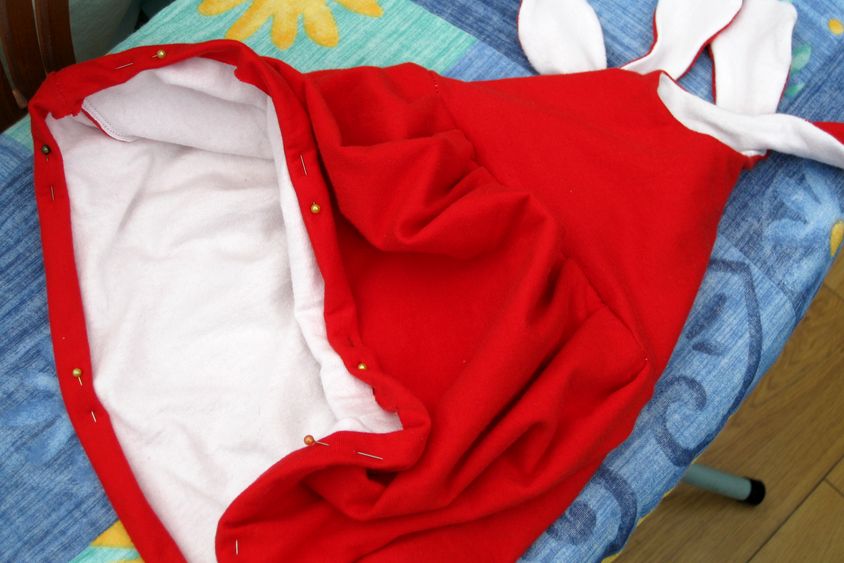
Now, the thing about following someone's tutorial is that everyone interprets instructions differently. I thought this was telling me to sew the two skirt pieces together, when, looking back on it, I think it's actually telling me to hand sew a long stitch in order to gather the skirt! I instead sewed the two pieces together and then gathered the skirt using pins. Ah well, still works! The main reason I interpreted this wrong, I think, is because the tutorial only uses one layer of material for the skirt, and I was using a lining.

The gathered skirt (with only one side seam, oops)
So anyway, moving on...
"With right sides together, sew bodice front to lining front on top edge. Clip seams at curves [what does this mean?!], turn inside out, press."
The difficult thing here was not understanding the instructions, but managing to sew a nice curve on the shoulder straps. Mainly because the machine kept EATING my material! Gah, so annoying! I managed to do it eventually, by giving myself a slightly larger seam than I started out doing, and pulling the material taut through the entire process. As you can see in the photo below, I had to start the stitch miles away from the edge so that it wouldn't eat it up. This process was repeated for the back of the bodice.

Below is the finished (and slightly wonky) seam! Not too bad considering, though. I think this was actually the second one, which would explain why it looks remarkably tidy!

out, press." Ooh I can do this one!

Yeah, I ended up hand finishing this part because I couldn't sew securely to the edges. Does everyone else have this problem, or is it just me who can't sew right to the edge of something?!
Next there was a bit about piping, but I wasn't doing that part. Then: "Turn skirt inside out. Line up top of skirt with bottom of bodice (right sides should be facing). Gather skirt so that side seams match on bodice and skirt. Pin together; sew just outside of gathered seam." Oky doky. Took me a minute to figure out which bits had to face where but I got there in the end!

I thought that sewing this part would be really difficult because of the gathering, but it really wasn't. One bit wasn't quite straight, but aside from that it looked pretty good. Here's what it looked like from the inside afterwards:

Oh. Wait. I'm not doing that. So... here I realised that I now had to come up with some super-genius way of hemming the bottom of the skirt, which I really should have done right at the very beginning!!
I decided the only way I could do it and have it look nice on both sides was a double turned hem. Easy enough to pin up, and would create a very nice red and white look.
After several days of umming and arring (which only amounts to about an hour really. Lol) I finally plucked up the courage to sew! You see, the thread was going to be well and truly on show (even if I'd used red thread, any mistakes would be easy to see), and I was worried about messing it up after all that work! (It was about 3 weeks by this point!! Oh the joy of having to work during naptimes and having so many other things on the go...)
I gave a blanket stitch a quick try, but as I thought, the hem was far to wide to look good. So I took the plunge and chose a triple zig-zag stitch. I really was taking deep breaths at this point! Then, after all that worrying, the machine chose this point to break the thread! Thankfully I could pick up where I left off and more or less cover up the problem. In doing this, I was sewing by hand rather than with the pedal, and this apparently causes the machine to drop stitches left, right and centre! I thought I was going to have to unpick it all! Thankfully when I went back to the foot pedal it stopped messing up and I managed to finish it. And it looks rather nice, if I may say so!


Those photos actually makes it look like there were no botches - sadly this wasn't the case. But at least they aren't too noticeable!
Et voila, one completed dress =D
I really wanted to see it on a baby, so of course....

I won't mention that that is actually my son! ...yeah, I feel bad. I promise I won't cross-dress you again (too much) Isaac! As you can see, it's actually quite small on him - but then it is supposed to be a newborn size, and he's 2 months and huge! So at least that means that it'll fit Z for a little while yet. Yay!
No comments:
Post a Comment